Showing posts with label Jerrod Steis. Show all posts

Wednesday, January 21, 2015

Support 101 Now Available in PDF


I've had some requests to put my series in a PDF format for ease of access on other devices.

-----


by Jerrod "Thousand Eyes" Steis

Saturday, January 17, 2015

Support Lanes 101: Be the Annoyance

(Artwork by ClandestineKnight)

by Jerrod "Thousand Eyes" Steis

In lane, a support’s job is to help their ADC farm in a safe fashion. There’s different ways to accomplish this based on what support you’re playing. Some supports excel at making the laning phase hell for the enemy. Sona or Zyra are great examples of this. Others just want to survive and make more of an impact in teamfights, a la Braum or Soraka. Finally, you’ve got your old-fashioned kill lanes. These lanes want to get in the face of the enemy and just fight fight fight. Leona or Annie can accomplish this pretty well; this is also where a lot of non-meta brusier supports fall too.

Poke Supports
To start, let’s look at the first category, the poke/harass support. Keep in mind I’m looking mainly at laning phase strengths. Supports that fall under this category are the following:

Excel in the Category
  • Sona
  • Zyra
  • Vel Koz
  • Karma
  • Lulu
  • Zilean
  • Any and all mid lane mages (Xerath, Ziggs, I don’t know what weird stuff you play.)

Can accomplish it, but not the best
  • Annie
  • Nami
  • Morgana
  • Fiddlesticks
  • Soraka
  • Janna

If you’re playing a poke support, you’re going to want to know the range of your enemies and your lane partner. It’s easy to know your limits, most people are able to pick that up after playing a champion a few times. To really excel at playing a poke support though you have to know your enemy’s limits. There’s a huge difference walking up to a Janna and walking up to a Taric or Blitzcrank that can punish your misposition hard.

Make good use of your auto attacks. Never let the enemy get something for free. If you watch your own minions and see when the enemy goes up to last hit, you know they’re committing that auto attack to that minion. They can’t retaliate if you sneak a little hit in. Just make sure you’re not agroing minions in the process either.

This is where it’s nice to get experience on a lot of other supports even if you want to focus on one. You’ll get a better feel for the cooldowns after using the abilities yourself than just watching. Take Blitzcrank as an extreme example. He’s extremely scary until you realize that one missed hook makes him a lot less useful as a champion.

This is really what will separate a good poke support player from a bad one. It takes a lot of awareness on all accounts. You have to keep 4 people’s cooldowns and ranges into account while only being able to see one set of them. You have to keep your position as tight as your ADC because with most of these champions, if you get caught out in the wrong spot you’re going down. Take note of if you have a heal or not because this can play a part in your ability to poke someone who could possibly poke back. One of the worst things is to trade with someone and put yourself low in the process when you have no way to heal it off.

If you’re playing Sona vs Janna, you can be a lot more aggressive in trades than you would with a Zyra or Lulu, Sona can heal off that damage immediately, while you only at best have a shield otherwise. Of course, these other supports usually make up for it in CC abilities.


Engage Supports

Next up we have the engage support category. This is the kind of support that can do basically two things. Fight or zone. They’re either going to get your lane really far ahead or fall behind so it’s important to try and make some kind of play with these. Here’s your list:


Excel in the Category
  • Blitzcrank
  • Leona
  • Annie
  • Morgana
  • Thresh


Can accomplish it, but not the best
  • Nami
  • Taric
  • Braum
  • Zyra
  • Alistar


Engage supports are generally binary in their success as a whole. What I mean by that is either they dominate their opponent in lane or do almost nothing. It’s possible that you can use some of your stuff to peel as well though, so keep this in mind when a 2v2 brawl starts and you aren’t the initiator.

These types of supports are generally tanky and are actually pretty great in solo queue. Because of their inherent tankiness, they are pretty forgiving if a miscommunication happens, and that’s not as often as other types of supports since they’re pretty obvious when they either go in or make a pick.

These are also the supports that are going to roam a lot more. Roaming is a great habit to get into, but it takes a lot of communication between you and the rest of your team. Your ADC has  to be aware that you’re leaving them for a while and that they need to play accordingly. Tag team a gank mid with your jungler. You can have the jungler chase them down into you when they head towards river and get a nice easy kill.

The weakness of these supports is that they are pretty cookie cutter in their impact, and if that strategy doesn't work, you’re in a bad spot. It’s also important to note that some of these supports will fall off later on in the game because they focus on bringing a lot of damage in early engages. Once a team starts getting some resistances, your damage will fall because you’re not primarily focusing on building it. Annie and Zyra are examples of this.

Finally, in lane you’ll want to have a control on vision, doubly so if you’re a champion that wants to force fights with skillshots. This would be Morgana, Blitzcrank, and Leona possibly. If the enemy can’t see you, you get a nice surprise on them to hit your shot. Also, having their bushes warded makes it easier to hit them obviously.


Teamfight/Utility Supports (Mostly No Lane Pressure)


Excel in the Category
  • Alistar
  • Braum
  • Janna
  • Soraka
  • Thresh


Can accomplish it, but not the best
  • Morgana
  • Nami
  • Taric
  • Lulu
  • Karma


The basic gist here is that these are the supports that bring power to their teammates. Some of them do it by buffing, others do it by being a tanky wall and standing in the way. A pretty common theme in these supports is not only their ability to protect, but also a lot of them have a very large lack of lane pressure. Let me state, this doesn’t apply to every champion in this list, just most.


Strategizing with these supports often involves sitting back a bit more and using the unique abilities you have to help your carry and/or team win in fights. These supports synergize best with late game focused ADCs and are at home sitting on top of them.


When picking a lot of these supports you have to realize that your laning phase is going to be a bit lackluster when compared to a support like a Sona or Leona. Your kill potential is low and you don’t have a way to retaliate poke most of the time. Granted some supports that bring a  lot of teamfight potential also are a boon in lane. Thresh and Taric can bring some decent engage potential to their ADC, Karma can poke people out pretty nicely as well.


Of course, don’t mistake this ability to bring some of the other categories in as reason to call that their strength. While Thresh and Taric do bring some nice engage, let’s take a look at what they can bring in a teamfight setting.


Thresh can push multiple people off and slow an enemy group while also grabbing a teammate and pulling them to him. Taric is able to bring extra armor to his team and can trade that off for armor pen for his team if he hits an enemy (very useful for an ADC getting chased by a tank). His ult is also one of the most undervalued abilities in the game as it brings free stats to all of his teammates near him and it’s on an outrageously low cooldown.


The idea here is that while you might have some ability to pressure in lane, your real strength is your utility after laning that you can still bring to the team. You give stats and peel to your team that isn't available to a lot of junglers or solo laners since they need abilities that can do damage.

One strength in lane that I do want to mention though is turn around potential. Since these supports are almost all focused on keeping people alive and giving them some extra oomph, they all have a great ability to turn fights around. Whether it’s through shielding damage, healing teammates, AoE CC, etc. you can make a lot of clutch saves for your team and pull out some great wins from losing fights. This is a counter-gankers best friend.

If you’ve got a jungler who wants to try and help you snowball, tell them to sit bot and that you’ll play really aggressively. If they wait a bit they can counter engage, and with your superior utility and safety, you’ll generally come out on top through buffs and debuffs.

Wrapping it up

Overall, it’s important to recognize what you’re able to do in lane as whatever champion you’re playing. Fully understand the weaknesses and strengths of what you can do and make sure the rest of your team is aware of this as well. Forcing yourself to play a champion in a laning style that isn't conducive to what they’re best at can not only hurt your chances in lane, but snowball the enemy team ahead to a point where your late game power spike will only be a spike to catch up. They say laning in solo queue is huge, so make sure you know what you’re doing.

Be sure to check out my other articles:


-----


by Jerrod "Thousand Eyes" Steis

Tuesday, January 13, 2015

WEEK 1 OGN/LCK BRINGS THE ACTION!


by Jerrod "Thousand Eyes" Steis

The first week of Korea’s professional circuit has completed and we can finally get back into professional LoL. Of course, one week isn't much in the grand scheme of things, but I think there are some good thoughts to take away from what we've seen so far. Keep in mind these are all just off of one series for most teams. This means what we've seen and what we get later on in the season might not match up. It’s also the first time a lot of these teams are working together since the merger and cutting out sister teams. There’s most likely a lot of work that still needs done.

KOREA IS THE FIRST REGION TO LEARN GNAR

Korea has always been known for being the dominant region overall, but they usually aren’t known for being the innovative ones or bringing out new metas. That’s usually reserved for EU or sometimes NA and then Korean players pick up and master it. We saw this with Ziggs, Maokai, and top lane Mundo for example. However this time, with the early start by Korea, they got the chance to be the pioneers. Gnar was almost always first pick or banned on red side. 

You could even bring up the ESL tourneys and say that EU and NA had a chance to bring it out and couldn't. We saw Gnar being played by Balls, widely regarded as one of the best top laners in NA, and he was mediocre on it to say the least. Meanwhile, the Gnar that was seen during Week 1 ranged from pretty solid overall to extraordinary and was an example of why Gnar is so powerful. Granted his 33% win rate wasn't anything spectacular, but even the losses had some good plays involved. 

The one win with Gnar in Smeb’s Game 2 from the GE vs IM series was absolutely spectacular. Not only was he able to win his lane pretty convincingly, but his late game team fighting and overall control of Gnar’s rage meter was impeccable. He was able to teleport at perfect times and control teams with his ults whenever needed. It’s safe to say that IM won’t be playing Gnar any time soon, and eventually he’s going to be permabanned as other pros learn to play him.

On a bit of a side note, it’s interesting to see that Korean players are more open than ever to trying new and innovative things. Wraith picked up not only a Lulu support, when she’s usually a flex mid or top pick, but a Syndra support as well. To be perfectly honest, the Syndra support - while not an optimal position for Syndra - didn't work out all too poorly for Samsung. The peel she had and ability to lower a tank that dove on the carry was pretty effective.

FAKER IS STILL GREAT, BUT CAN'T SOLO CARRY

One of the biggest things I saw was how teams were able to just shut Faker down. Barring his Game 3 vs. Najin, Faker didn't really accomplish much when he played. SKT won their series vs. Najin, but Faker went 1-1 overall. Also in the game he won, he had an early gank from Wolf (who ended up taking the MVP away from Faker who had a pentakill). He needed help getting ahead to become the monster he was always known to be. His Xerath was just not impactful and they even put him in a lane that was destined to lose, as well as giving him a champ that isn't really his playstyle. Easyhoon is outshining Faker on almost all aspects outside of assassin play, which is still only on the outskirts of coming into the meta.

Speaking of Wolf, he’s really shown to be one of the star players with Easyhoon on SKT. His roaming on Janna was top notch and he made his presence known all around the map in both controlling his champion and controlling vision. He almost single-handedly gave Faker his snowball in Game 3 vs IM. Also his Janna became ban worthy after that series which says a lot when you’d rather ban out a support than either mid laner SKT has.

Both Bengi and MaRin looked pretty good in the pre-season, but once they got into the regular season they had a noticeable drop in performance. Bengi just seemed to not know where to be exactly and MaRin lost a few lanes and didn't position his Rumble ults as well as he could have. Combine that with no response to the camping of Faker that CJ Entus pulled off in their second game against SKT and you’ll find a struggling SKT that seemed to pick up where they left off at the end of last season.

RIOT KEPT OUT OF OGN'S BROADCAST

When I saw that OGN would be broadcast for free on Riot’s stream, I was feeling both excited and worried. I was happy that finally the best region in League was going to be as well covered and open to the public as it always should have been, but I had reservations to how Riot would go about it. MonteCristo and DOA are known for their strikingly different style of casting. DOA cracks jokes about the game and talks about his support *insert carry champ* and Monte is very upfront and brutally honest in his analysis of teams play as well as Riot’s decisions in where they move the game.

My biggest fear was that they would try and tone down Monte and DOA in order to fall in line with what the NA and EU LCS casts were like. The recent news of them replacing the LPLEN stream didn't really inspire a lot of hope either. To my delight though, the OGN steam was left untouched. The only difference is where you go to watch the stream. 

According to Monte, both he and DOA are still contracted to OGN and are not considered Riot employees. This gives them a bit more freedom in their ability to cast within their own style. Overall, I’m very happy to see that nothing noticeable is different on the Korean scene coverage.

CJ ENTUS IS MAKING A (bit of a) COMEBACK

Being a CJ fan, I remember seeing that they played SKT and thinking of how they’d most likely get rocked by Faker and Bang/Wolf. I was wonderfully surprised to see that all the players on CJ stepped up to the plate and really improved their play from the preseason. While overall the games themselves weren't exactly high quality in terms of strategy, CJ still looked much better than before.

SKT was making poor and cocky calls all throughout the series and CJ not only called them on it but came up with some great plays of their own. CoCo really shined this series and Shy also proved to be a very powerful and annoying Mundo. Even Ambition seemed to be getting more comfortable in his new jungle role. 

One of the biggest and most surprising things for me though was watching Space. Space has always been known as the player that held CJ Frost back, that MadLife was stuck in “Space Prison.” This series, however, Space made plays. His Corki was just the right amount of ballsy in order to get in and get out without dying. To be honest, it seemed more like MadLife was holding Space back in the series as he was missing some pretty easy skillshots. His vision control was very aggressive though and he was able to get a few nice flash Flays in the second game on Thresh.

One thing I think CJ needs to work on is their pick/ban phase. They didn't ban Gnar in either game, and while MaRin didn't perform spectacularly in Game 1, the composition almost certainly should have left CJ reeling. Let’s look at the P/B phase for Game 1:
While I admire the Janna ban from CJ they left Gnar open first pick, which was immediately locked in by SKT. The Jarvan and Corki pickups were nice though. Now at this point, it should be noted that Easyhoon is playing mid and not Faker. 

Easyhoon is known as a much more passive player and prefers mages rather than assassins. This becomes important when Xerath gets locked in. Xerath is all about poke, and CJ countered with Mundo and Braum, two beefy guys that can stop the poke. Once those were baited out, SKT locked in Lee Sin and Sivir for the massive engage from Annie, Gnar and Sivir which has almost no way of being stopped. CoCo locked in Jayce as a final pick, which didn't really put a lot of pressure on to Easyhoon in lane like you can with a blind pick Xerath.

Honestly, CJ got played hardcore in picks and bans. They left Gnar open and then fell for the thought of it being a poke comp with Xerath rather than taking a deeper look at the Annie and Gnar picks. Yes, SKT is very mid-centric, but they have other good players as well.

It was through some good objective control and some sloppy play by SKT that CJ could pull out the win in the first game. Shy got too tanky to deal with and literally could fight three people at once while his team mopped up the rest.

CONCLUSION

Overall, Week 1 of OGN brought a lot of interesting stories in ways I didn't expect. I knew that Gnar would be an insta pick/ban in every almost every game. I had also figured, as we got closer to the actual broadcast, that Riot was not going to do much to mess with Monte and DOA.

Seeing CJ wake up and SKT and Faker struggle was a bit of a surprise though. All of the unorthodox picks were really fresh from Korea as well. It’s shaping up to be an exciting split for OGN/LCK. Lots of new teams and strategies, old players, new players, and now a way to see it all for free!

----
by Jerrod "Thousand Eyes" Steis

Tuesday, December 23, 2014

Support Lanes 101: To Dive or Peel


by Jerrod "Thousand Eyes" Steis

Choosing when to dive or peel is probably one of the biggest mistakes made in low ELO support. A lot of supports have kits that function well for both diving the enemy and keeping their carry safe. Doing the wrong one at the wrong time can cost your team the game. The full answer isn't as simple as “Oh, you’re Leona, you dive.” It requires an analysis of your own team, the enemy team, the status of both team's carries in terms of power and what cooldowns are available.


First, take a look at your own champion before anything else. What kind of support are you? Tanky supports have a better time diving the enemy than mage supports, but that alone doesn't decide it. Keep in mind, just because it is easy to dive doesn't mean you should. There are champions like Leona and Alistar that are great at diving into the fray and being a huge nuisance, but they sometimes have to sit back and peel. That being said, there are mages that can effectively “dive” or at the very least use their spells to interrupt the backline. Janna is great example of someone who fits that bill. She can throw tornadoes back deep and even flash ult if she wants to sacrifice herself to disrupt a fight in an extreme way.


Once you’ve established what your champion is best at, look at your team composition. Every decent team comp will have an ADC, the same one you helped grow and feed. Is this an ADC that needs to be protected and, if free from enemy interference, can win the game for you? An example of this kind of ADC would be Vayne or Kog Maw. These ADCs absolutely require help from somewhere if they want to stay alive long enough to output damage during a fight. Others, like Caitlyn or late game Tristana, are a bit safer in their range and escapes. They still are the backbone of damage on your team and need to stay alive.


Of course you could make the same argument for any ADC, so it’s kind of irrelevant in the grand scheme of it all. What is more important is looking at your solo lanes and junglers. Do you have an assassin or traditional mage in mid? Keep in mind that you’ll have a larger backline to keep safe in a fight if you have a mage, while assassins will need help creating picks and killing off the enemy. If you look over at top lane, you can have a multitude of different champions, and the same goes for jungle. There’s hyper tanks, bruisers, assassins, mages, supports, etc. Overall as a general rule, the more big bodies you have to clog up the middle of a fight, the more reasonable it is for you to dive. At least when looking purely at your own team's comp.


The reason for this is that you’ve got a much more cluttered area going on in the middle of the scuffle and as each of the team's tanks and bruisers are trying to get past each other, both ADCs will be outputting damage.


Next up, you want to take a similar look at the enemy composition. Pick apart what their strengths are. Have they got an assassin like Zed that can jump into your team? That’s a point towards peeling in that case. If they have an Anivia, however, you can go in the other direction and try and get in her face.


Finally, what I could consider the most crucial part is evaluating the gold distribution. Once the teams have gotten into game a bit it’ll become clear who on the enemy team is a threat, and who on your team is dangerous as well. Going back to the Zed example, if the enemy Zed jumps on to your ADC in a fight, but he’s 0/4/1 and doesn't have any of his spike items(brut/botrk) he isn't going to do anything. If the carry is someone like Lucian or any other ADC with mobility, they can just kite him around and be fine. If the same Zed jumps in but instead of 0/4/1 he’s actually 3/0/2, then he is a problem and kiting him out most likely won’t be enough. You’ll have to sit back on your ADC and keep them safe.


You still want to do the same for your own team, too. If the enemy team wants to dive deep into your team to kill the 1/6/2 ADC while your solo laners go to town in their backline, don’t make the mistake of trying to help the ADC. While it’d be nice to have that ADC get back in the game, they are currently your weakest link and you need to play to your strengths. If you help the ADC rather than helping your solo lane bruisers/assassins you run the risk of having a lose/lose situation where both the ADC die and your solo laners didn't do enough. It’s a similar concept as when a jungler ganks a lane that’s already winning but a little bit. You put your eggs in the basket that looks like it’s gonna win.


As you can probably tell, trying to do this decision making on the fly is pretty hard. It’s one of the things that makes the professionals a cut above the average player. After you break it down a few times it gets more and more doable, eventually to the point that it becomes second nature. Learn your matchups and use them to help you understand what to do when, and don’t flounder in making your choice.


TL;DR:
Look at your champ’s skills (Better at dive or peel?)
Look at your team’s skills and needs (Need lots of peel? Can dive free?)
Look at the enemy team’s skills and needs (They have a lot of protection? Want all over your carry?)
Look at how gold is distributed (Assassin fed, Carry not? Vice-Versa?)


Be sure to check out my other articles:

By Jerrod "Thousand Eyes" Steis 

Thursday, October 23, 2014

Support Lanes 101: Warding


by Jerrod "Thousand Eyes" Steis

So we’re now at what I would consider one of the most important parts of the game, whether you play support or not. Warding. I always live by the principle “Warding wins games.” It’s not only important to see the enemy to know where they are, but that same info tells you where they aren’t.

I’m sure if you watch professional League play you’ll see teams making moves in the game to mirror or counter what their enemy is doing. This seems simple enough watching with both teams vision on your screen, but if you watch a stream or only one players view you’ll see how assumptions need to be made based on the enemies movements while visible. It’s easy to say that you’d rather spend that 75-100 gold on an item that will make your in-fight presence bigger, but that presence won’t mean anything if the enemy gets the jump on you.

Obviously, for supports, warding is an even more integral part of the game. As a support, you are the one in charge of wards in the game. You need to do everything in your power to spread vision around for your team, lord knows they won’t. How many times have you pinged for a teammate that someone was heading down their way only to see them stay too long and get caught out? If the area is warded and they see a fed mid laner heading their way, they will absolutely move because it’s tangible to them that they’re in danger.

Throughout this article I’m going to cover a bunch of topics such as when to buy your Sightstone/Trinket/Pink Wards, and warding areas at different points of the game. One thing I want to make sure I talk about though, because I don’t ever see warding guides cover this and I had to learn the hard way, is when to ward those areas. I remember starting out and seeing all of these places I was told to ward, but I would always die when trying to place them. Warding is complicated. You need your vision to be deep enough to be relevant to where the game is currently, but also not too deep that you get caught trying to place it.

Purchasing your Items


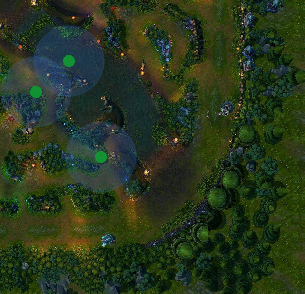
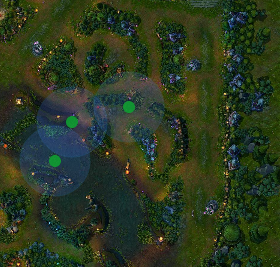
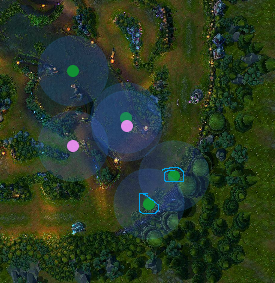
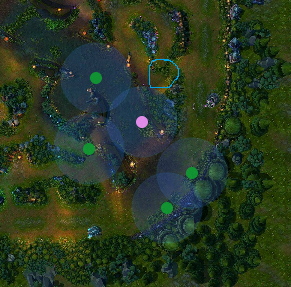
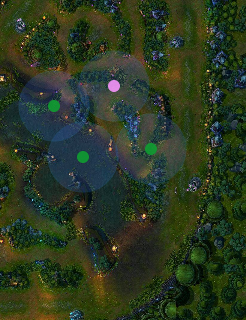
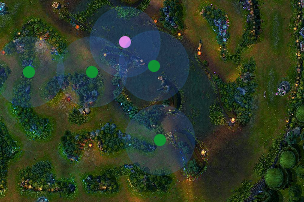
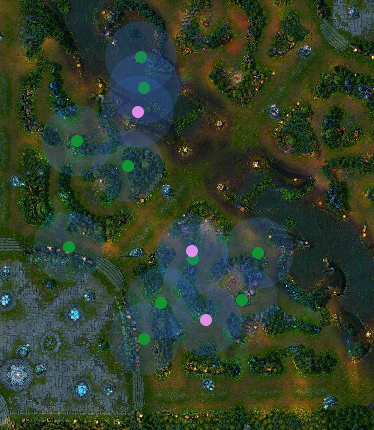
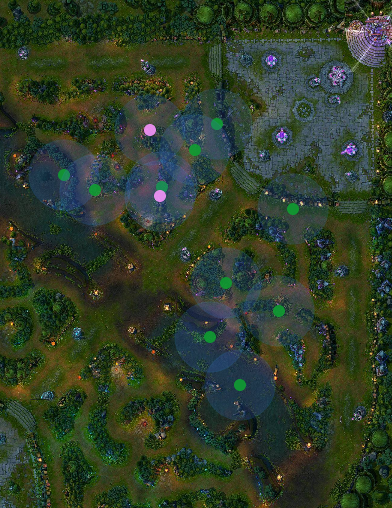
Trinket - Starting out every game you’ll almost always get a warding totem. Sweeper is useful, but the cooldown on it early in the game just isn't worth trading a free refreshable ward. Unless you know your jungler is going to camp bottom early, having a warding totem for lane bush vision is extremely useful. Outside of that use, if you run out of wards early, your and your ADC can cycle your wards and keep vision out in the river constantly.

Usually you’ll want to swap your trinket after your first back and you’ll absolutely want to swap it after your Sightstone is purchased. There’s no need to hold on to that free ward when you get 4 every time you head back to base. Pick up a sweeper and start paying attention to where the enemy is placing their own wards, if you weren't already. You've probably seen their support or ADC leaving the lane for a little bit, they’re probably going and placing a ward. Keep an eye out for when they leave and if you don’t see the ward actually get placed check one of the locations we’re gonna cover later on in the article. Chances are they placed it in a similar spot. Be aware though that it takes two full minutes for the trinket to be usable after swapping.

As for upgrading to Oracle Lens, that is a bit trickier. You see, you already have to wait until you hit level 9 to upgrade it. It doesn't change the cooldown or enhance the ability of the sweeping portion at all. It does, however, give you true vision around your champion for 10 seconds. Invaluable for searching areas like Baron or Dragon pits, and if the enemy has an assassin with stealth (Akali, Shaco, Rengar) or a champion like the demon spawn Teemo, who will place invisible traps everywhere. Even if you miss with your initial sweep, you’ll be able to pick it up as you walk around for a bit and clear a large area of enemy vision. Causing them to run right into you in some cases as they try and get it back.


Sightstone - Sightstone is going to be a buy on every single support, there is literally no reason to avoid it. Delay it, maybe, but it will always be bought. With the amount of wards you’ll need to place, this item is basically saving you an insane amount of money. It gives you enough wards to cover your full amount out at one time and then an extra one as well.

You’ll get all of this for the low low price of just 800 gold. Insanely cheap for the health you get in addition to the wards. You should buy this once you have the cash, depending on what you’re looking for in lane. If you delay it you need to realize that you have to continue to buy wards.

If you decide to spend the money on upgrading your support item, it can be perfectly fine. I usually do this on lane dominant supports because it gives me more presence in lane. Sona is a good example of this since she is all about poking and auto attack harassing her opponent down. Just remember to get some wards as well on your back. If you only have exactly 500 gold, do not only upgrade your support item and just go back to lane. Instead buy a Ruby Crystal and green ward. If not, get something cheaper and a few green and pink wards.

Upgrading to Ruby Sightstone is a lot less important, in fact maybe one of your final buys. It costs another 800 gold for only 250 health and an extra ward. Not worth the cost. That gold can be better invested elsewhere. Especially since you can only have three wards out at a time.


Pink Wards - These things are so powerful and people don’t realize it. A permanent ward that reveals all wards surrounding it and anything else stealthed as well. It isn't invisible itself, but it takes five shots to kill. I try and keep at least one on me at all times, even if I have one out already.

Pink Wards can be used in a bunch of unconventional ways. Placing multiple in one area can force the enemy to stay and clear vision for a lengthy amount of time. Placing one in an area you know the enemy will clear can bait them into death. If you’re intelligent with your placement too, you can get a lot of vision for a long time as well. Pink wards are going to be a special part of this article so we’ll cover that in more detail later.

Ward Placing

So getting wards is something decently simple to understand, but placing them is a whole other story. For a while now every summoner has been limited to three green wards on the map at one time and one pink ward. This is because in the older days, supports would generally get the burden of all vision placement, and they were basically used as roaming vision bots that had some abilities.

Now you have to be smarter with your wards. Each one will cover an area for up to 3 minutes and if you ward the wrong area you’re going to assume you’re safe when in actuality you’re getting jumped on. This can be even more detrimental than not warding at all sometimes depending on your playstyle.

When you ward you’re trying to get vision in an area that is important for some reason. Sure getting that ward over by the enemy blue buff is great and will give you an awesome amount of vision, but how deep are you going into enemy territory to get that ward down? Is the enemy even going to pass by that ward realistically? Could they collapse on you easily? These are all things you need to think about before you go to ward.

You can effectively ward defensively or offensively depending on the situation and it’s going to be different depending on what you need. You have to ask yourself, “Where do I need to see for either my team or myself to make smart and well-informed decisions. When you break it down to something simple like that it becomes a lot easier to ward.

Early Game

In the ultra-early game (I.E. before minions spawn), you might want to take a look at the enemy team and determine what the chances are for an early invade.

Blue Side


Here’s an example of how to handle an invade while on the blue side of the map. If the enemy has shown signs of trying to take your red buff, these are the places to ward. You’ll most likely only need to use your warding totem since it should last long enough to get you the info you need. If you know for sure that the enemy is coming you can place a ward on the red buff itself or in the bush to see them taking it.

Red Side


And here’s the same view and three wards if you’re on red side. Defending and warding blue buff is a much different task than red buff. Blue has a much smaller area to cover around it and if the enemy is trying to sneak in, there’s only one way to do it. Otherwise they’re just going to brute force it through the dragon pit ramp. Once again, trinket should be all you need here

Once you get into laning, and even further on in the game, both sides ward about the same areas, but the reasoning for warding the areas is different depending on which side you’re on. What I mean by this is depending on your side the same ward could be offensive or defensive. Let’s look at bot lane vision from the view of a blue side support.

Blue Side


Basically you’re going to want vision of the bottom bushes at almost all points of the laning phase. Whether this is with a ward or with your own person can be dependent on the matchup and strength levels at the time. You’re going to want to keep an eye on supports like Leona or Blitzcrank so vision here is crucial against them. Usually a trinket ward can suffice here in order to use your three minute green ward for more crucial and protective areas such as dragon or gank paths.

The river wards are going to keep an eye on any jungler that would gank you early. Keep an eye on where the jungler starts (Usually indicated by whichever enemy lane shows up late) and assume that the first possible gank could occur around three minutes. This is a problem if the enemy jungler started opposite from you as you’ll need vision in the river to make it safe to move up past that time. Generally, the deeper ward in front of the dragon pit is the better ward since it gives vision of the enemy sooner, but the one in the river bush is a quicker dirtier ward that lets you get back into lane faster at the cost of deep vision. If the jungler started on the same side as you you can hold off on that ward a bit longer to have the vision and safety a bit later

The pink wards are for when you have an aggressive jungler who wants to try and make plays early. You’ll want to keep an eye out for when the enemy support puts a ward down and put the pink near that area. These are general spots I’ve listed that will usually get warded at some point. Having a pink in one of these areas gives your jungler the go ahead that they aren’t wasting time being seen if they try and gank your lane and can be great at giving you a nice lead if you can get the gank off.

Red Side


Very similar thought process here. Bush wards we went over and the same with the dragon pit which, by the way, is a lot safer to reach from red side since you have access to the ramp. Warding dragon is less of a boon for you though on red side since most blue side junglers won’t be following that particular gank path so you should only ward dragon if you’re worried about them taking it when on red side.

If you’re constantly pushing up to the enemy tower it’s incredibly important to keep that tribush warded since that’s by far the most common place you’ll see the jungler coming from. It’s really risky to stay pushed up if you’re not keeping vision there. If the enemy starts putting a pink ward in that bush and taking your vision, wait until you shove them into their tower again and call your ADC up to help you take the pink. The enemy ADC will be forced to focus on getting CS under tower and you’ll have a numbers advantage in taking the ward, since the enemy support is stuck trying to defend it by themselves.

The reason I don’t encourage pinking anywhere but that river bush is that there really isn't anywhere else you can defend a pink ward consistently. If you place it in the tribush and you get pushed back a little bit, you’re losing that one immediately. If you put it on dragon you’re leaving it out in the open. The bush vision goes back and forth so often that you can’t rely on that either. This pink can clear out a decent level of wards for your jungler.

The blue circle is a very defensive ward that I place when I’m fearful of the enemy coming to try and dive me and/or my ADC under tower at any point in the lane. This is once again a time where the trinket ward can do wonders, since it’s usually a specific time that you’d be worried about a dive. This ward can save a spiraling lane from getting disastrous in some cases, letting you know when to back off and give up a tower rather than your lives and a tower.

Mid Game - Defensive

Blue Side


If after laning phase you find yourself on the defensive side and being pushed in, these should be your go to wards. You want to keep some kind of vision on dragon at all times, because this is when it is a highly-contested objective. The green wards in tri and lane bushes give you info on where the enemy is going after they push the lane up. If they keep pushing up, put up a green ward over in the bush by golems and see where they go from there.

When warding for dragon if you’re able to get the whole way around into the pit, which isn’t always possible, try and put your ward inside the overhang corner right on the inside. This keeps enemy pink wards from seeing it unless they get the pink ward inside the pit, which a lot of people don’t do. Otherwise, if you’re zoned out from the pit or think they may be trying to take dragon at the time, just toss a ward over the wall and at least get the timer on it.

The pinks are a bit situational. If you know the enemy is warding offensively in your jungle, get a pink somewhere in there. I find around mid game a lot of people put a ward on the upper bush by red buff. and in the “death bush” (The small patch in the middle of the river) by dragon (this one is a bit hard to protect though).These pinks usually spot out an enemy ward and even if they don’t, having long term vision in those areas is a great thing for your team anyway.

Red Side


Red side jungle near bottom lane just doesn't have as much to cover when you’re pushed back. That’s not to say that vision in those areas is any less important, just that it takes less wards to do the same job.

Just like with blue side you’ll still want dragon vision, and even still, you might want to do the same trick I mentioned before with putting the ward inside the pit to hide it from pinks. The nice thing here is that you’ve got access to the ramp from red side meaning you can get in and out a lot safer even if you’ve been pushed back. Getting a death bush ward is nice, but even getting a ward around the side bush is great for seeing if the enemy is moving towards dragon and it’s not checked by sweepers or pinks anywhere near as often.
If you want to try and put a pink ward further up, go for it, but realize it’s going to be a bit harder to protect since you don’t have a safe way to stay up there with towers down. The pink ward by blue buff is nice once your bottom tower dies since that’s the first objective that the enemy would look to invade and steal. If the enemy bottom lane is a lot stronger than you, they could tell their jungler that and coordinate screwing up the blue buff trade for your mid laner. That’s the correct way to transfer your power to your team’s power.

Mid Game - Offensive

Blue Side


When you’re on the offensive side of things from blue, you want to try and make use of the fact that the enemy has to take a risk by walking away from their furthest tower. Remember though, you’re further away from your tower at this point too. If you’ve got the advantage you can cover dragon and basically any avenue towards it.

Getting some sight on the enemy blue buff is a great way to push this advantage. You can turn your power bot lane into a power gain to your mid lane by taking control here and messing with the trade off. Similarly, placing some vision around the same bends as a defensive red side ward will let you know how the enemy is transitioning behind the scenes. Basically, you want to imagine yourself in your enemies shoes and think about where they’d likely walk.

Red Side


Red side is harder to take advantage of when you’re ahead in lane and get pressured. There are a lot of walls that you can’t go by without putting yourself in a dangerous situation. Even the far left ward on this map is pretty scary to do if you’re not certain on enemy positions.

If you’re ahead you should be able get vision on dragon pretty easily, especially since you’ve got the ramp like we talked about earlier. The pink in the death bush is easy to protect and a much more favorable position now as well.

Tribush and outer red buff bush wards are nice for keeping track of possible ganks or invades by the enemy jungler. Warding by wraiths is extremely useful and informative, but also risky if the enemy was walking that way or saw you go in, which is decently common, you’re caught on the way out.

Late Game - Defensive/Offensive


If you’re looking at this and wondering how the hell you’re going to ward all of this by yourself, good. Because at this point, and even before, WARDING IS A TEAM ACTIVITY. There’s a lot to cover here and you need to cover it well because you’re trying to claw your way back into the game at this point. You need to catch the enemy making a transition when they think they’re safe. Realistically, a lot of these could be pink wards as well. I just put a few of the ones that I personally prefer.

If you can cover both dragon and baron, then go for it, but realize that those are 2 of your three wards going to objectives that at this point in the game you’re giving up especially if you don’t have vision in the routes leading to these. Baron is important to cover and a much bigger objective, so I think keeping a ward there is useful. Usually dragon gold becomes pretty insubstantial, so I would forgo it and try and just keep a timer on it.

You’ll also want to prioritize your wards on the side that the enemy is trying to push and control. There’s no point in warding the bottom part of your jungle if the enemy is focusing on shoving in your top lane and controlling baron. Don’t just blindly ward, use the knowledge you do have to see where you need to focus your info gathering.

I consider warding late game to be one of the hardest things to do in this game, because it is a very reactive progress. At this point, your plan is pretty much as far gone as it can be in the game. Not only do you have a lot more ground to cover, but there are a lot more people with sweepers clearing out the little percentage of area you can cover.

You also need to keep in mind that at this point you’re going to need backup if you’re going to ward anywhere that isn’t immediately close to a tower. Supports get blown up easily so walking blindly around is a great way to get killed. Make sure you note where the enemy team is or isn't when you go into fog of war.

If you’re on the offensive side of things from red side. The only thing that changes is which sides of walls you place your wards. Your goal on that aspect is to try and extend your lead by taking what used to be safe zones from the enemy.

Probably the most important thing I could state here is to keep your vision relevant. You've only got a few wards you can place, so make them count.

Late Game - Offensive/Defensive


Pretty similar concept here. Only change is the flip of the map. You’ll be able to keep better track of dragon from this side, but baron can be a challenge if you’re on red and stuck on the defensive.

Concerning the topic of moving from offensive to defensive, it’s important to continually move your wards up with where your team is positioning. Don’t just wait until you’re sieging to try and get your vision down. A lot of times that can be too late. I always try and cover my teams flanks as we move up, especially if the enemy has someone split pushing or continually separated from their group.

When you’re going to ward objectives like baron or dragon try and ward your way to them if you’re playing from behind. If you just blindly walk over to those areas you’re sure to get jumped somewhere in between. I can’t stress enough how important the buddy system is for warding in the late game. That three minutes of vision is not worth your life!

Wrapping it All Up

I think that about covers everything. If there’s something I missed or something I didn’t go into enough detail about, please let me know. I’m always looking to learn more and debate topics in League, especially about supporting. I’m also looking for new topics to cover here. If you guys have more specific topics you’d like me to cover let me know either by commenting here, PMing me on Reddit, or messaging me on Twitter. @1000EyesLoL


Be sure to check out my other articles:
----


By Jerrod "Thousand Eyes" Steis